LEDE Project 是一個基於 OpenWrt 的 Linux 作業系統。她能夠取代由供應商提供的無線路由器或是其他非網路裝置的韌體。
本篇文章將會紀錄如何從 source code 編譯起 LEDE 給予 TP-Link Archer C2600 使用。
0x1 取得原始碼
我們可以從 LEDE Project 的 git 或是 GitHub mirror 取得原始碼:
|
1 2 3 4 5 6 7 |
$ git clone https://github.com/lede-project/source lede $ cd lede $ ls bin BSDmakefile build_dir config Config.in dl feeds feeds.conf.default include key–build key–build.pub LICENSE Makefile package README rules.mk scripts staging_dir target tmp toolchain tools |
0x2 安裝需求套件
- 官方提供之需求套件:
- gcc, binutils, bzip2, flex, python, perl, make, find, grep, diff, unzip, gawk, getopt, subversion, libz-dev and libc headers
- Archlinux:
pacman -S git gcc bzip2 flex python python2 perl patch make unzip gawk subversion
0x3 更新 feeds, 安裝 LuCI
feeds 是由 LEDE community 所維護的套件的管理工具。LuCI 則是提供網頁管理界面的套件,我們必須要透過 feeds 來安裝 LuCI:
|
1 2 |
$ scripts/feeds update $ scripts/feeds install luci |
0x4 設定 LEDE
LEDE 使用 Kconfig 來進行設定,我們可以透過 make menuconfig 來開啟設定畫面:
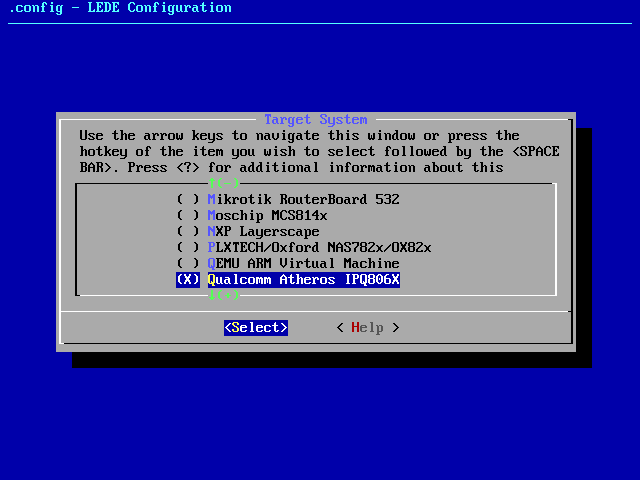
Target System -> Enter -> 往下選擇 Qualcomm Atheros IPQ806X:
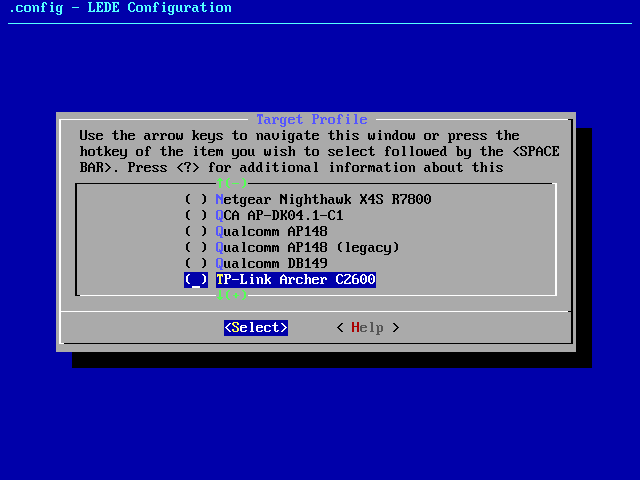
Target Profile -> Enter -> 往下選擇 TP-Link Archer C2600:
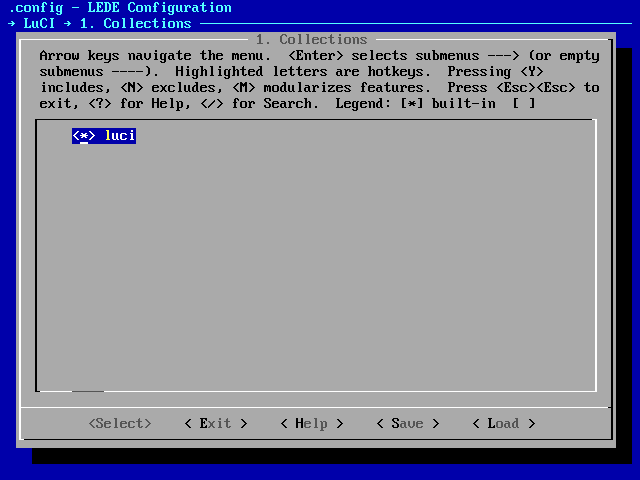
選單往下選擇 LuCI -> 1. Collections -> luci 按下 y:
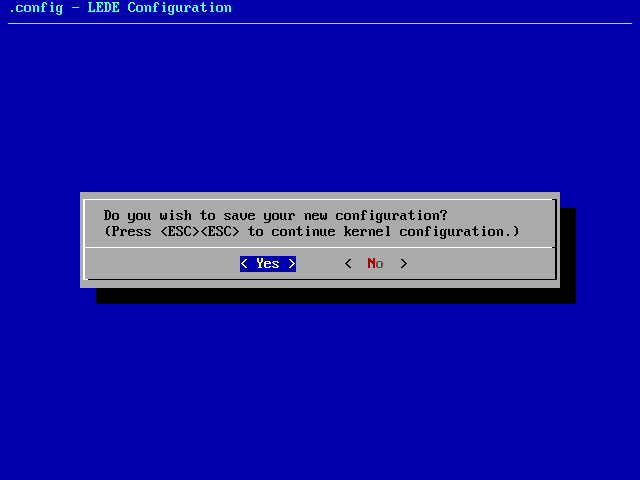
選擇完畢後在選單就可以選則 Exit 退出了,save configuration 選擇 yes:
0x5 編譯 LEDE
使用 make -j8 來編譯 LEDE,注意到 -j 後面的數字可以變大來加速 (請參酌自身 CPU 能力):
|
1 2 3 4 5 6 7 8 9 10 11 12 13 14 15 16 17 |
$ make –j8 V=s make[1] world make[2] tools/compile make[3] –C tools/flock compile make[3] –C tools/sed compile make[3] –C tools/patch compile make[3] –C tools/xz compile make[3] –C tools/tar compile make[3] –C tools/m4 compile make[3] –C tools/autoconf compile make[3] –C tools/pkg–config compile make[3] –C tools/automake compile make[3] –C tools/missing–macros compile make[3] –C tools/libtool compile make[3] –C tools/gmp compile make[3] –C tools/mpfr compile ... |
編譯完成後,bin file 會放置於 bin/targets/ipq806x/generic 裡面:
|
1 2 3 4 5 6 |
$ ls bin/targets/ipq806x/generic config.seed lede–ipq806x–ubifs–root.img lede–ipq806x–C2600–squashfs–factory.bin lede–ipq806x–vmlinux.elf lede–ipq806x–C2600–squashfs–sysupgrade.bin packages lede–ipq806x–device–c2600.manifest sha256sums lede–ipq806x–squashfs–root.img |
重要的是這兩個檔案:
- lede-ipq806x-C2600-squashfs-factory.bin
- lede-ipq806x-C2600-squashfs-sysupgrade.bin
0x6 更新 LEDE firmware 到 C2600
1. 原生 firmware
從 192.168.0.1 進入管理界面後,Advance -> System Tools -> Firmware Upgrade。點選 Browse 選擇 lede-ipq806x-C2600-squashfs-factory.bin,然後點選 Upgrade 來更新韌體。
2. LEDE firmware
From LuCI:
如果你已經是 LEDE 了,就從 192.168.1.1 進入管理界面,System -> Backup / Flash Firmware。選擇 Flash new firmware image 的 Choose File,選擇 lede-ipq806x-C2600-squashfs-sysupgrade.bin,不要選錯了,是 sysupgrade。不過選錯也沒關係,會跳出錯誤訊息。
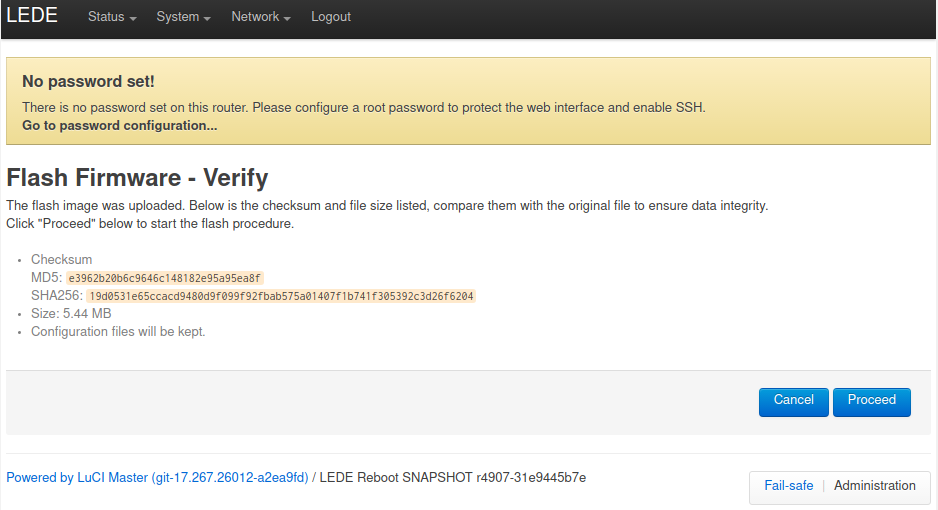
接著會出現 Verify 畫面,基本上因為是自己編譯的 binary file 所以不用檢查,但是如果你是從網路上獲得 binary file,請務必要做檢查!
確認無誤後,點選 Proceed 開始刷機。
From Command Line
身為一個工程師,知道 command line 的替代方案也是很合理的。請備而不用,因為你真的可能會用到。如果前面你沒有透過 feeds 安裝 LuCI 的話,你就沒有辦法從網頁界面刷機器了。
這時候請透過 sysupgrade 來刷機:
|
1 2 3 4 5 6 7 8 9 10 11 12 13 14 15 16 17 18 19 20 21 22 23 24 25 26 27 28 29 30 31 32 33 34 35 36 37 38 39 |
$ scp bin/targets/ipq806x/generic/lede–ipq806x–C2600–squashfs–sysupgrade.bin root@192.168.1.1:/tmp $ ssh root@192.168.1.1 $ cd /tmp $ sysupgrade –v lede–ipq806x–C2600–squashfs–sysupgrade.bin Saving config files... etc/config/dhcp etc/config/dropbear etc/config/firewall etc/config/luci etc/config/network etc/config/rpcd etc/config/system etc/config/ubootenv etc/config/ucitrack etc/config/uhttpd etc/config/wireless etc/dropbear/dropbear_rsa_host_key etc/group etc/hosts etc/inittab etc/luci–uploads/.placeholder etc/opkg/keys/5151f69420c3f508 etc/opkg/keys/72a57f2191b211e0 etc/opkg/keys/792d9d9b39f180dc etc/opkg/keys/9ef4694208102c43 etc/opkg/keys/b5043e70f9a75cde etc/opkg/keys/b95e720274e746e5 etc/opkg/keys/dace9d4df16896bf etc/opkg/keys/dd6de0d06bbd3d85 etc/passwd etc/profile etc/rc.local etc/shadow etc/shells etc/sysctl.conf etc/sysctl.d/local.conf Commencing upgrade. All shell sessions will be closed now. Connection to 192.168.1.1 closed by remote host. Connection to 192.168.1.1 closed. |
0x7 確認刷機是否成功
從刷機指令下去到重新啟動大概要 5 分鐘的時間,請在這段時間內泡杯茶。有段時間 Power 會持續規律閃爍,機器並沒有壞掉,請留點時間給它。刷機完成後,其他的 LED 燈就會亮回來了。
感恩師父,讚嘆師父,C2600 如此就可以使用 LEDE 了!
(2.4G wifi 以及 5G wifi 指示燈無法使用為正常狀況,請參考: [OpenWrt-Devel] [PATCH] [ipq806x] initial support for TP-Link Archer C2600)
0x8 如果刷成磚塊
別怕,刷成磚塊不用接線去燒錄,透過內建的 tftp 就可以還原了。至於怎麼用,因為我還沒有刷成磚塊,故只放上 OpenWrt 的網址,請自行參透,或是待我刷壞。
網址: https://wiki.openwrt.org/toh/tp-link/tp-link_archer_c2600_v1#specific_values_needed_for_tftp
請參考上述網址 Debricking 部份。
0x9 編譯過程中出錯
編譯過程中如果出錯,請使用 make -j1 V=s 來觀察錯誤資訊,根據錯誤資訊來修正錯誤。很痛苦。

Leave a Reply